 unique fashion
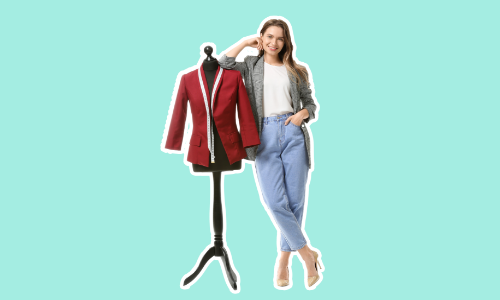
Learn Fashion Design
Explore the inner world of fashion design and bring your designs to life with practical skills.


).jpg)
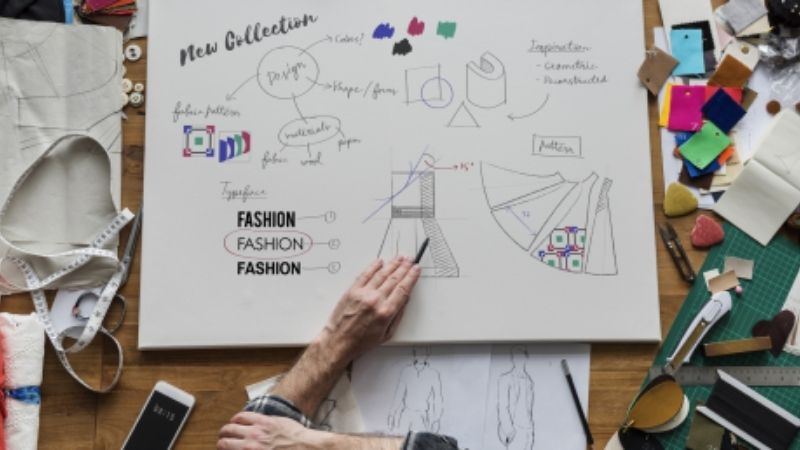
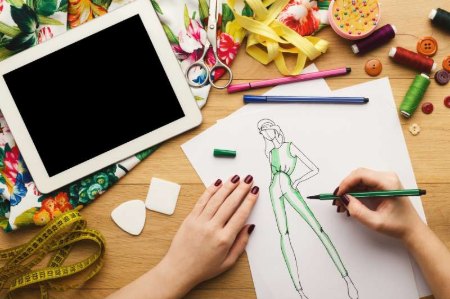
Every design begins as a sketch. A fashion sketch is the first step in bringing your fashion creations to life; you can almost call it the blueprint for a design. These sketches aren't accompanied by a figure, and their core purpose is to communicate your design and all its technical elements, such as length of garment and fit, to the viewer.
Unlike a flat sketch, fashion illustrations are more detailed with the addition of colour, texture, shading, and movement lines. Fashion illustration is the art of drawing, sketching, or painting fashion concepts and design ideas used to visualise a garment before it’s produced. Fashion illustration is more stylistic.
The steps below are quite simple when drawing a basic, flat fashion sketch.
The shape is also referred to as the silhouette of your garment. Ask yourself, is it a fitted or an oversized garment?
Without design details, a garment can’t exist. Design details refer to both functional and decorative seams, volume like pleats and frills, fastenings like buttons and zips, and any other details from necklines, collar, and pockets to stitch details like embroidery. By adding these details, you give the viewer a better understanding of what the final product will look like.
Refine the sketch by erasing all the unnecessary lines.
Explore the inner world of fashion design and bring your designs to life with practical skills.
To successfully communicate your design through a fashion illustration, you first need to learn how to speak the language. This involves learning how to create a 9-head figure, draw your garment design on the figure, and render that design to portray a certain textile, texture, and print.
To start your fashion illustration journey, it's important to invest in a sketchbook. A sketchbook is essential to a designer as it gives an insight into the designer’s collection of inspiration, thought processes, and displays idea generation and development. It has also been proven [Joicey and Nothdruft, 2013; Barnard, 2014] to boost creativity and help designers grow ideas and develop new ones which is especially important if you're looking to start your own clothing line.
First, you need to lightly draw the outline of your fashion figure. You can do this by either drawing a figure from scratch or using a fashion figure template.
To draw your own fashion figure, follow the steps below.
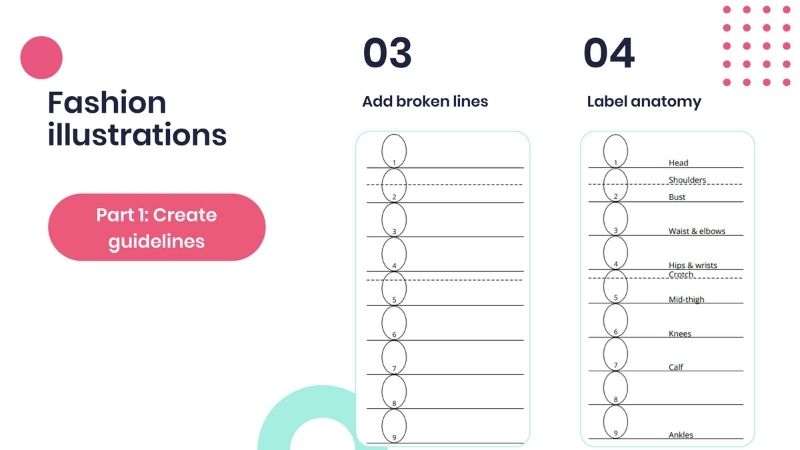
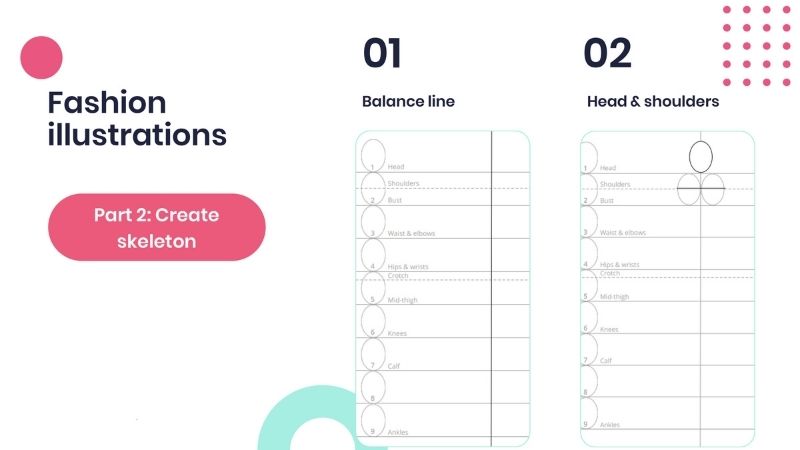
1. Draw nine heads that are roughly the same shape and size. Label them one-nine. Leave some space at the bottom of your page for the feet.
2. Draw horizontal lines between each head.

3. Draw a broken line at head 1,5 and 4,25.
4. Label the anatomy.
1. Draw your balance line. This is a vertical line perpendicular to the horizontal guidelines.
2. Draw an oval for the head. Draw a horizontal line for the shoulders, roughly two heads wide.
3. Draw a horizontal line for the hips, roughly one and a half to two heads wide.
4. Draw a horizontal line for the waist, roughly one head wide.

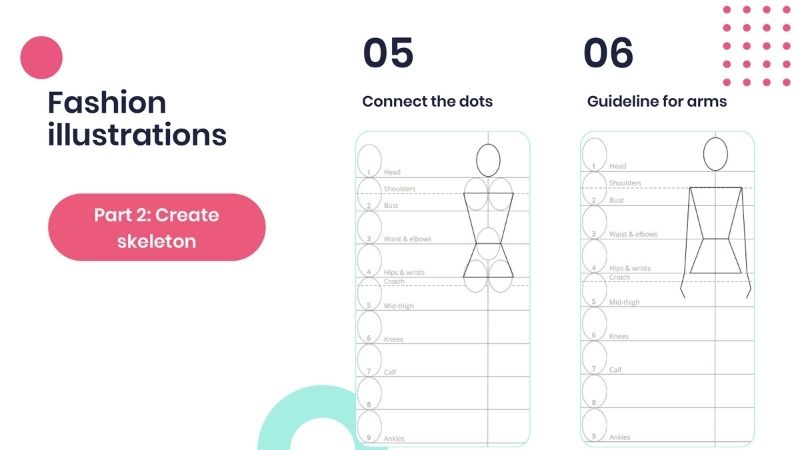
5. Connect the shoulders, waist, and hips.
6. Draw a guideline for the arms.
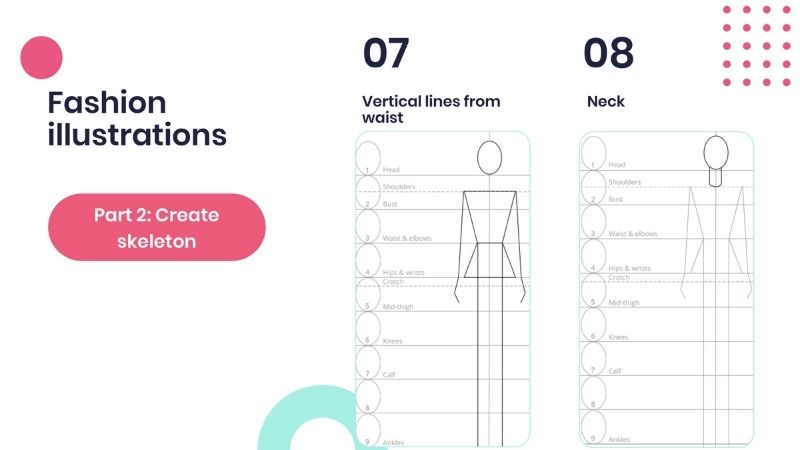
7. Draw vertical lines from the waist down to the ankle guideline.
8. Draw a cylinder for the neck.
9. Connect the neck to the shoulders.
10. Draw small ovals for the knees. Draw small ovals for the ankles. These ovals must be a little bit smaller than the ovals for the knees.

1. To create the arms, draw ovals for the shoulders, bicep, and lower arm.
2. Draw ovals for the upper and lower leg. Draw triangles for the feet.

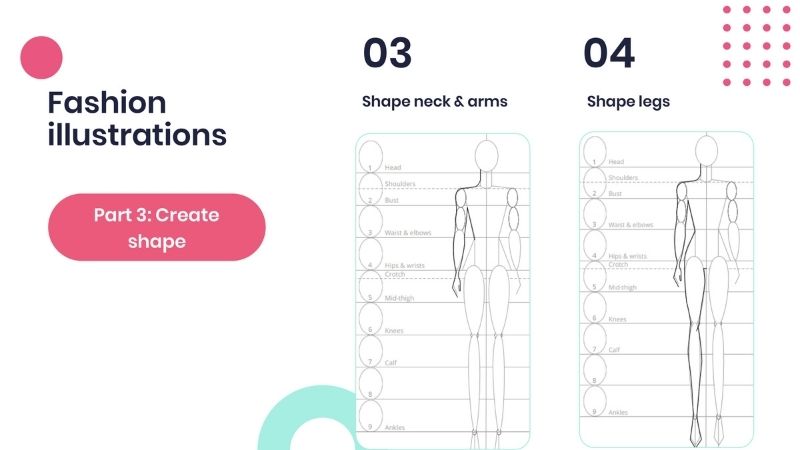
3. Add shape to the neck and outline the arms, using the ovals as guidelines.
4. Add shape to the legs by using the ovals as guidelines.
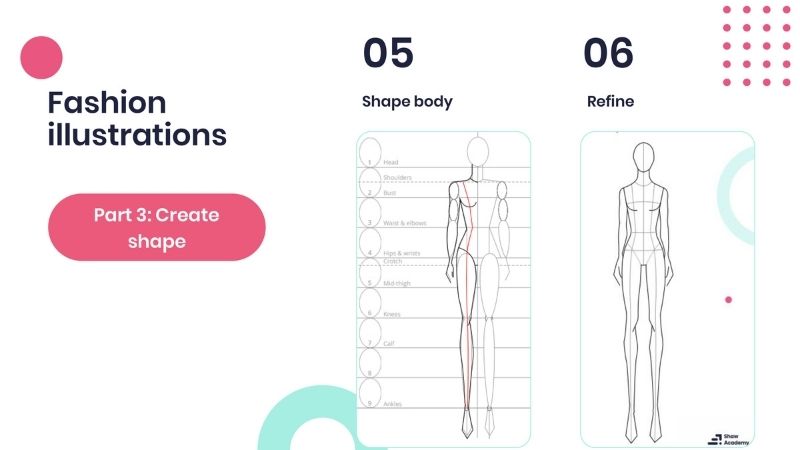
5. Add neckline, bustline, and underwear line. Add princess style line.
6. Refine the figure. Always remember, what you do on one side, you must repeat on the other side. If you've only drawn one side, copy it to the other side by folding it on the balance line and tracing over it.
Now you can start with the fun part which is dressing your figure in your designs. Start by creating an outline of your desired silhouette on the body. Top tip: If you find yourself stuck in a creative rut, it is always a good idea to keep an eye on the latest fashion trends as a source of inspiration for silhouette, textile, and colour.
Similar to the flat sketch, adding design details to your fashion figure will transform your design from being a simple shape into a piece of art. Because humans have soft bodies, it is important to indicate how the garment drapes over and around the body. Compression folds like wrinkles and volume create a sense of movement in illustration.
Clothing drawn on the figure can either be detailed, or it can be simplistic, forcing the viewer to use his/her imagination to fill in the missing details. Whether detailed or minimalistic, focus on creating illustrations that express your unique style with each element. When you are happy with how your garment design looks on your figure, you can outline your final figure with a fine liner, erasing all the unnecessary process lines.
Once your drawing accurately depicts the silhouette and design details of your garment, rendering is the way by which you can convey information about the fabric, print, and colour choices that make your design unique. Adding shade during this stage is important to imitate a three-dimensional person wearing your design; this creates even more movement.
To render, designers either specialise in one kind of medium like paint, or a combination of mediums which include coloured pencils, markers and more. Taking the time to experiment with different mediums to accurately match colour, capture texture and prints, and display important design details will produce an illustration that is effective and visually compelling.
As a beginner, it is important to study other illustrator's work, but eventually, you will develop your own signature style. To do this, you need to be willing to spend some time experimenting with different drawing techniques and rendering mediums.
There are a variety of things that determine your style; do you like using paint, coloured pencils, or do you stick to black and white? How do you illustrate the face of the figure? What kind of clothes are you designing? All these little details work together to create a look that is distinctively yours.
.jpg)

5 Apr 2023
This blog explores the benefits of 3D garment asset creation in fashion design, including faster design iterations, improved fit and functionality, reduced waste, increased collaboration, and cost savings. As the technology continues to evolve, it has the


The Copyright @ 2025 epatternz.com All rights reserved.


.jpg)
